This guide will lead you through the following steps:
|
|
|
Step 1. Set the amount payable |
|
If the amount payable can vary (for example because the user is able to select multiple products for purchase) please ensure that your form includes a calculation of the amount payable or a request to the visitor to enter the amount payable. |
|
|
Step 2. Setting up online payment |
|
Edit your form to allow your visitors to make online payments: go to the Settings tab and click on General. |
 |
This will open the Settings pane for online payments. Use it to make following settings:
Select the payment provider you wish to use (see list).
If the amount payable is fixed, leave the default Fixed Amount selected and enter the amount. If the amount payable on the form needs to be entered or calculated, select the applicable item. At this point you must also specify the currency.
Depending on the payment provider you select, a box may appear requesting Personal Details and/or Shipping Address. Here you can specify the place in the form where the visitor will be asked to enter the relevant information. Your choice of method and/or payment provider will determine whether this box appears and what information is required. We recommend that you always enter this information to the extent that you request details in your form. If you do not require these customer details, you can ask your payment service provider whether it is necessary to request it in your case.
Please supply a description of the payment – it will appear on the payer’s bank statement. We recommend including the Entry ID in this description in case the payer has a query about the payment. Use the [abc] button to the right of the Description field to ensure that the description includes the Entry ID, other system codes or any information entered into the form.
If you offer your visitors alternatives to paying online, you can create a filter to indicate the situations in which online payment is obligatory. For example, you may prefer your customers to pay on delivery or by bank transfer. You will need to create a filter to set this up.
If you are using a workflow and you want the payment to take place within the workflow rather than after initial completion, you can indicate this by using a filter.
As well as the Status and the Payment ID (which Formdesk processes as a matter of course), some payment providers offer additional feedback information. If you want to view this information, you can capture it using a hidden text area in your form.
|
|
|
Step 3. Testing online payment |
So far, nothing has changed for your form visitor, because online payment has not yet been activated. Now is the moment to test online payment in your form. You can activate online payment by clicking on the Questions tab and selecting Test Form or by adding the following to your URL: ‘?payment=test': www.formdesk.com/your_account/your_form?payment=test
This will give you access to Formdesk’s test account with your payment provider. It is possible that this test account will display payment methods that you ultimately decide not to use (or vice versa).
Complete the form and submit it. The window that appears is generated by the payment provider, not Formdesk. The following payment providers require specific details for testing:
You can now choose either to abort the test payment and return to the form, or to complete the test ‘payment’. Completing the test payment will initiate the submission process. This process can include actions such as sending emails, on-screen notifications, workflow, etc.
Please note that once a form is submitted the information entered immediately appears in your results list – even though the payment process has not yet been initiated. This means that you can view the information on failed or incomplete payments, as well as successful payments. If you view the results list at this point, you will see the payment status displayed next to the result.
Note: Forms with online payments in a Frame
Because the payment screen is used by different parties (Formdesk, Payment Provider and banks), the user accesses another website depending on the payment method. Because all these websites are subject to the IT policies of another organization, if only one of them has some strict policy in regard to the payment screen now or in the future the payment will be frustrated. So please make sure that your form will open in a separate window rather than being iframed if you want to be sure the payment will work properly. |
|
|
Step 4. Buy the Online Payment add-on |
|
If your tests were successful and you are satisfied the results, you can now purchase the Online Payment add-on. Go to the Forms Summary and click on Subscription. In Step 2, click on Online Payment Add-On and follow the steps indicated to complete your purchase. |
|
|
Step 5. Payment provider |
You will need your own account with a payment provider. If you do not already have one, please open one. Once you have opened your account, link it to your Formdesk form.
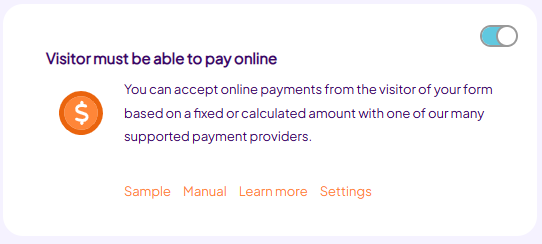
Edit the form, go to the General section of the Settings tab and click on Visitor Must Be Able To Pay Online to return to the Settings pane. You will see that several questions have now been added to the Merchant box. Go to your payment provider account to get the required information:
- Authorize.Net: Account > Settings > Security Settings
- IcePay: Dashboard > My websites
- Mollie: My account > Website profiles
- MultiSafePay: Dashboard > Settings > Website settings
- Paypal: Dashboard > My Apps > REST API apps
- Stripe: My Account > API Keys
- CM.com: Account > Settings > payment methods
Note: Docdata and Icepay needs an update URL: https://fdx.formdesk.com/payment_webhook.asp?id_transaction= Replace x for the number that is displayed in your url when you open the form. |
|
|
Payment status |
In the results overview you will find the payment status for each entry. Precisely which statuses are available will depend on the payment provider you are using (not all payment providers support and/or pass on all payment statuses).
Paid - Payment successful.
Cancelled - visitor has aborted the payment process.
Failed - payment failed.
Started - payment window initiated.
Charged back - Payment has been charged back.
In Process - Payment process has started.
n/a - Online payment is not available due to the use of a filter or because online payment is not applicable.
Paid out - the amount payable has been paid to you by the payment provider.
Expired - payment expired, and no payment has been made.
If you want to receive an email notification of any change of payment status, please include Payment Status in the Send Criteria for the notification. |
|
|
Searching by Entry ID or Payment ID |
|
As well as Payment Status information, each payment entry has an associated Entry ID (generated by Formdesk) and a Payment ID (generated by the payment provider). Go to the Form Summary and search using the Entry ID or Payment ID to find all related entries. |
|
|
|
|
|